【Photoshop】線の太さが表示されない時の対処法【新人デザイナー向け】
Creative21
NexOut


Photoshopで選んでいるレイヤーのバウンディングボックスが表示されない。
何故かバウンディングボックスが表示されなくなってしまった。
バウンディングボックスが表示される様にしたい。
こういった疑問に答えるよ!

やぁ!みんな!元気?
デザイナーの@岸岡直哉です。
Youtube
目次
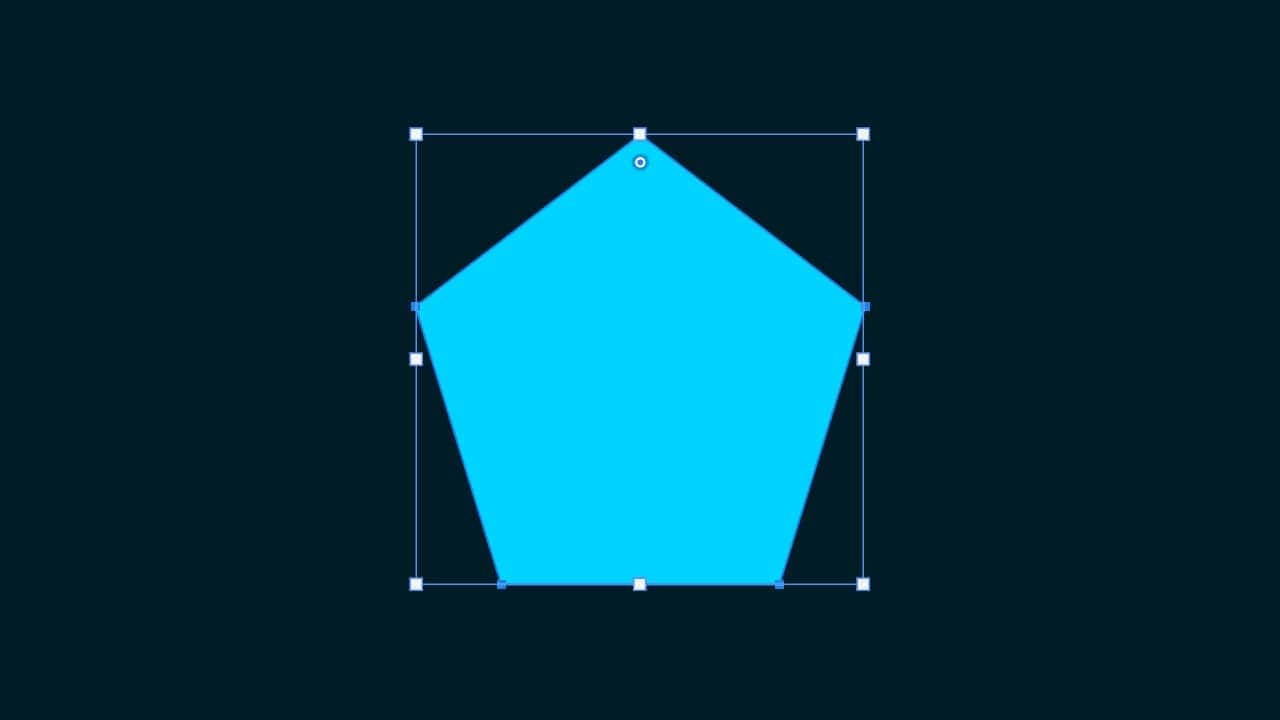
Photoshopでバウンディングボックスが表示されない時の対処法はこんな感じ。
順番に見て行こう!
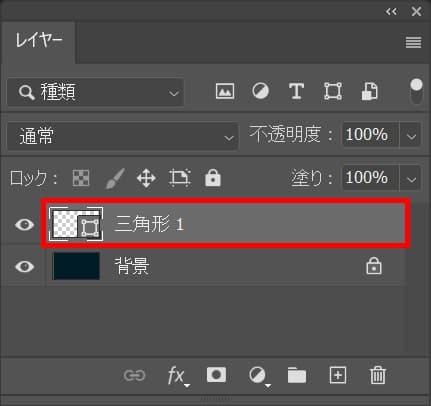
レイヤーを選択!
レイヤーが表示されていない人はメニューバーの「ウィンドウ」→「レイヤー」を選択!

ツールバーから移動ツールを選択!

オプションバーから「バウンディングボックスを表示」を選択!
これでバウンディングボックスが表示されたね!
無料LINE登録で『知らないと損するPhotoshopショートカット表』プレゼント!
※本キャンペーンは予告なく変更または終了する場合がございます